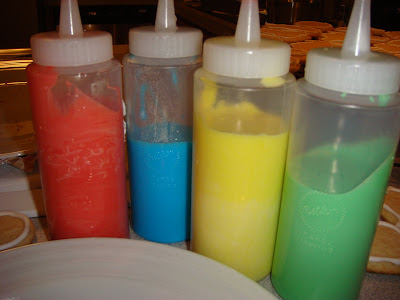
So here is what you do...
1. Make sure you have time- and by time I mean hours.
2. Make a batch of the thick royal icing. See Bakeat350 for instructions.
3. Fill your bottle with the thick icing. (I used white just because it was easy for my first time)
4. Outline the cookies and then let dry.


 5. Make the thin royal icing. See Bakeat350 for instructions. This icing should be the consistency of syrup.
6. Separate out the colors and add food coloring. Fill the bottles. (I chose these 4 colors because again it was easy for a first time. I really don't like these colors together and they got boring quick.)
6. Fill the cookies and use a technique called "flooding" and then use a toothpick to pop the air bubbles and to get the icing all the way to the edge.
7. Decorate!!!
 --These cookies were easy to make. Fill the cookie with your base color. Then swirl with other colors (look at the first cookie.) Then using your tooth pick make lines in the cookie and it will make the spider-web look like you see above. You can do this technique for any of the cookies and it really adds detail.


 These cookies have the same tooth pick technique like the swirl ones. Just put dots on the cookie after you fill it and then use your tooth pick to make the design that you want.
 --These cookies were easy to make. Fill the cookie with your base color. Then swirl with other colors (look at the first cookie.) Then using your tooth pick make lines in the cookie and it will make the spider-web look like you see above. You can do this technique for any of the cookies and it really adds detail.


 These cookies have the same tooth pick technique like the swirl ones. Just put dots on the cookie after you fill it and then use your tooth pick to make the design that you want.
 These were a lot of fun to make BUT there is a lot of stuff that I have learned. Thanks to other blogs out there that give hints on how to perfect this art I think I know a little more. I needed the practice on outlining the cookies and filling. Next time I will use only 2 kinds of cookie cutters and do the same on each cookie AND I won't use white as the outline. At least they taste YUMMY especially after I cleaned the messy kitchen...

No comments:
Post a Comment