Wednesday, November 9, 2011

Bow Tutorial #2- Rosettes

Yay for bow tutorial #2!!  The ones that I am going to show you how to do are called rosettes.  They are also super easy to make and do not require a sewing maching (YAY).

Here is what you will need:
Fabric- the longer the fabric, the bigger the rosette will be.  My fabric was about 11 in. long
Felt square
Hot glue gun and hot glue sticks
Alligater clip or hair clip of choice (head band)
DSC_0739

This is what you can make....ahhhh smiles
DSC_0726

Take your fabric that you can get at Walmart for $1.00 and open it up.  Cut a 1 1/2 inch wide strip long-ways from the fabric. 
Cut a 2 inch wide circle from the felt.  It does not have to be perfect, just freehand it.  This will be the piece that you glue the fabric to.

DSC_0734

Put a dot of hot glue in the center of the felt and push one of the ends of the fabric into the glue and wait for it to secure.  Using your fingers, twist the fabric.  Using the hot glue, secure the fabric as you twist around the center fabric piece until you have no more fabric left.

DSC_0735

It should look like this.
DSC_0736

Or like these.

DSC_0738

Secure an alligater clip on the back of just one or you can  glue three rosettes together and glue one alligater clip on.
DSC_0739

It will look like this if you would like to put three together.  Then you can clip the rosettes onto any elastic head band.  If you choose to use only one rosette, you can put a clip on the back and clip directly into hair.  There are so many ways to do this and so many color combinations.  Just have fun doing it!

Don't you just see all the things that you can use these on?

Monday, November 7, 2011

Bow Tutorial #1

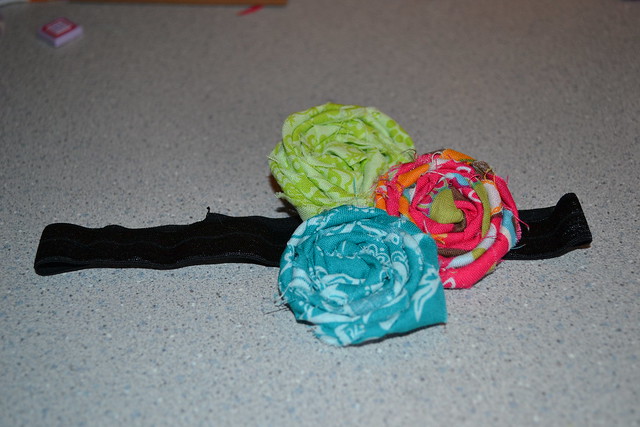
Since finding out that Matt and I are having a girl, I have been thinking of lots and lots of fun things that I can make for her before she makes her big enterance.  Nothing screams girl more then a BIG BOW.  For a while now I have been making bows (through trial and error) out of different kinds of fabric.  Below is a little tutorial of one of the kinds of bows that I made today.

DSC_0726

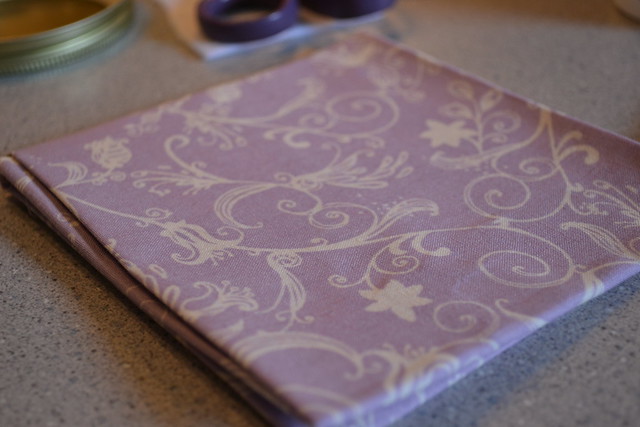
You can buy fabric squares at Wal-Mart for $1.00 in all kinds of patterns.  I picked up a few that I really liked and thought would go together.  This fabric can be used for a few other kinds of bows that I will share with you in later posts.

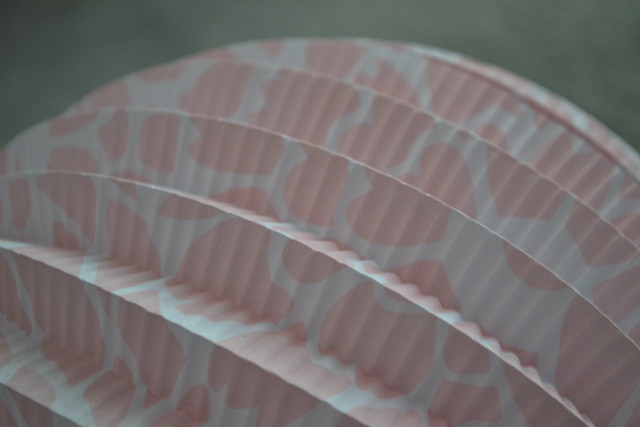
Keep the squares folded (make sure you take out the cardboard that is inside).  You need to make 2 different size circles.  Each size I made with a different color, as seen below.

To make the bigger circle, I traced on the square of fabric the top of a lid from a candle.  The smaller circle I made from the bottom of a cup. 

DSC_0725

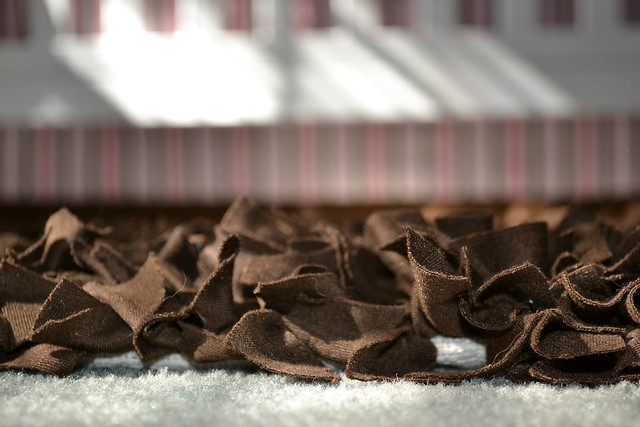
If you trace the circle template on the fabric square, using kitchen scissors you can cut all circles at one time.  They do not need to be perfect.  You need at least 6 circles of both sizes.

DSC_0730

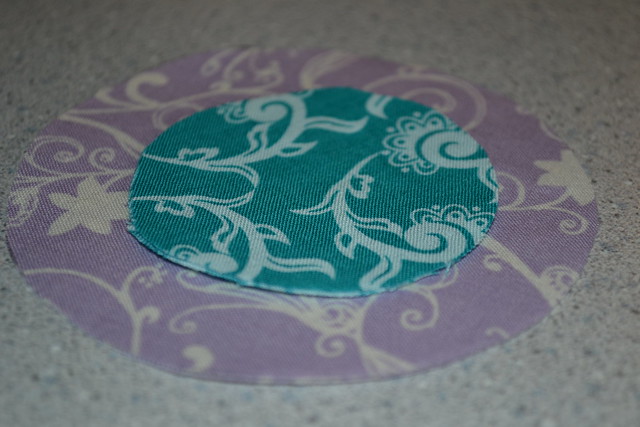
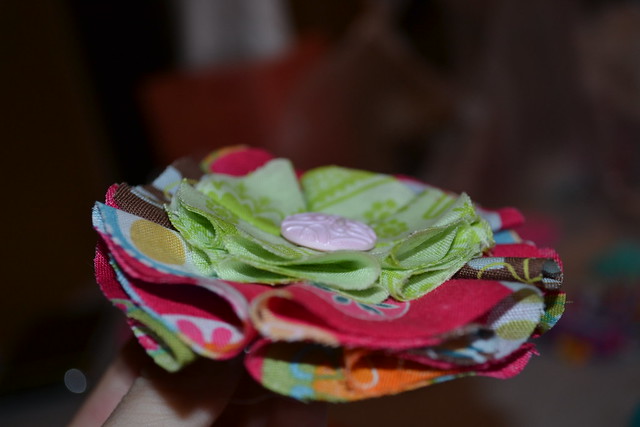
See the difference in size?

DSC_0729

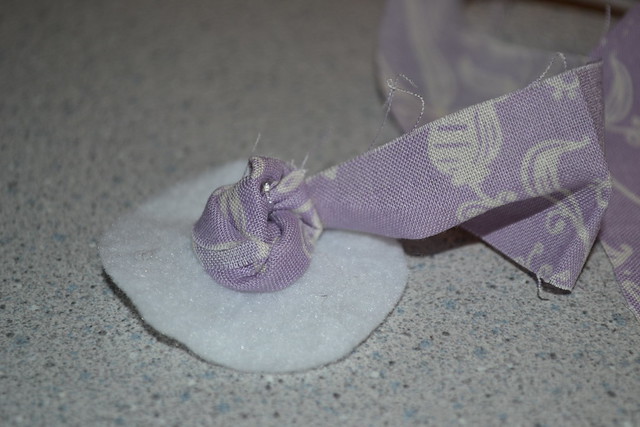
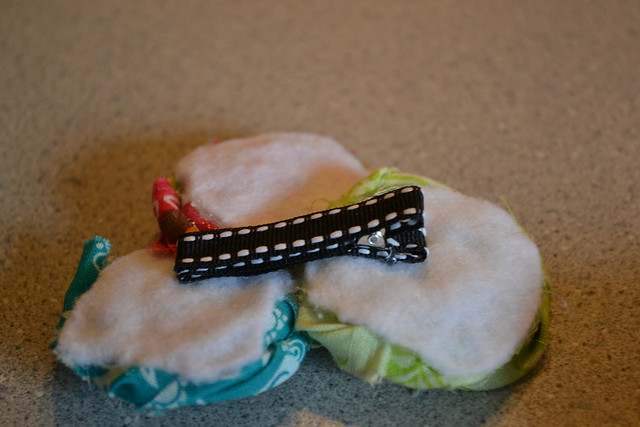
You need a hot glue gun for this part and a small circle of felt (.10 a sheet at Wal-Mart) which will be used to glue the pieces down.  See below a finished bow at what the back looks like.

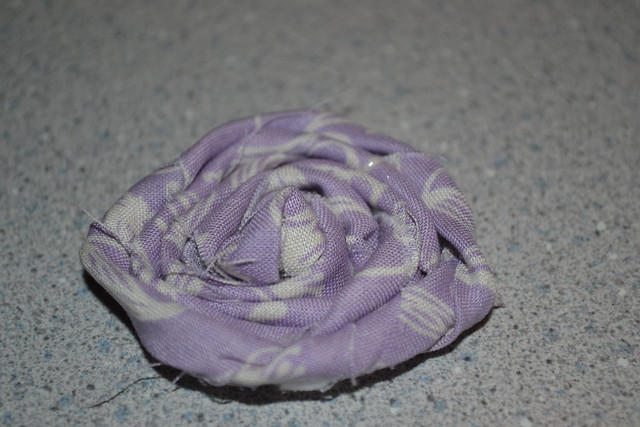
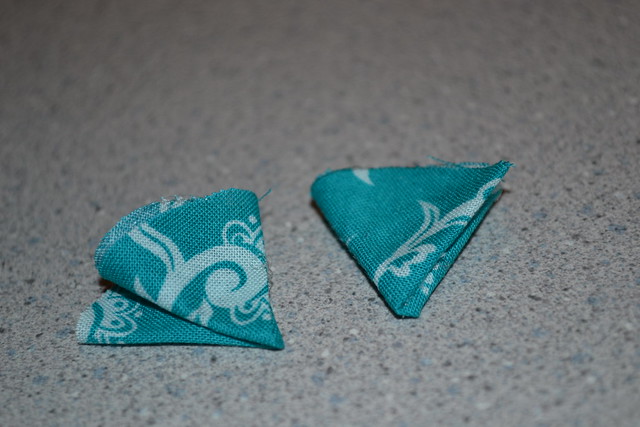
Taking one of the circles, fold in half and using the hot glue, put a strip of glue to hold secure.  Make sure not to get the glue too high, you want them to look "fluffy."  Then fold half to the front and half to the back.  Look at the above picture, it's kind of hard to explain how to do this.  Using the hot glue, secure the folds.  Remember not to get too high with the glue.

Do this will all 6 big circles and all 6 small.  They do not have to be perfect.  In fact it gives a little personality not having them so exact.

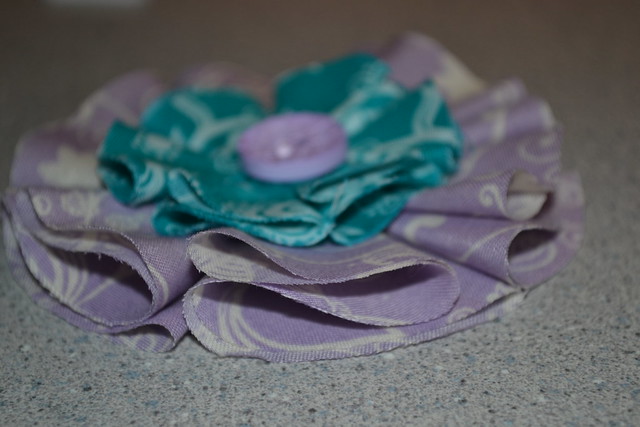
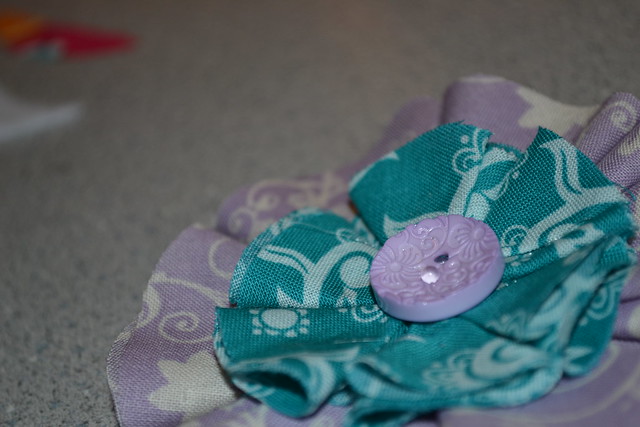
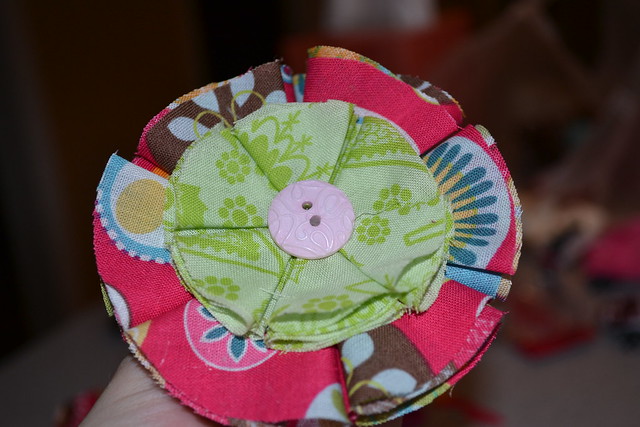
Get the felt circle ready.  Glue the big circle pieces down onto the felt first matching up the corners.  Then on top, glue on the small circle pieces the same way you did the bigger ones.  Look at the picture below to see what it should look like.  Then you can glue on a button or bead- anything that can decorate the center of the bow!  You are ALMOST done!!
DSC_0731

DSC_0732

DSC_0733

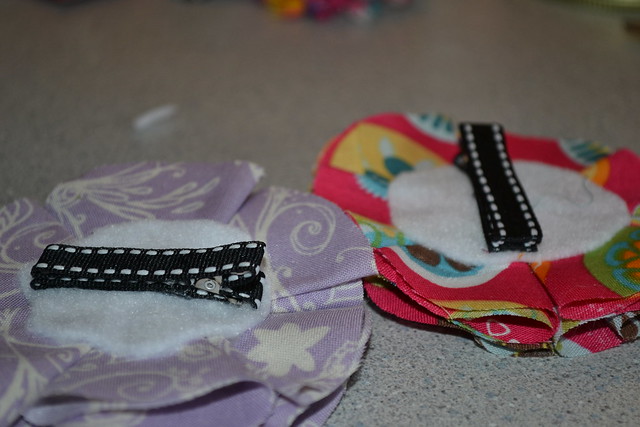
On the back, glue on the hair clip.  I covered them in ribbon using hot glue.  It takes a few times covering them to get the hang of it.  If you do not want them on a hair clip, you can put straight on a head band.  I just know with a growing babies head, I don't want to secure on a head band in one size.  With a clip, I can still clip onto a stretchy head band and be able to change out as her head grows.  And when she gets a lot of hair I can just use as a hair clip as well and not a head band.
DSC_0728

DSC_0727

These really are super easy.  Once you make one, you will see what I mean.  I think I will be making these as gifts for all of the little girls I know. 

Be looking for more tutorials on how to make different kind of bows.  I have about 3 other kinds all to make NOT having to use a sewing machine.  Easy and cheap.

Let me know how yours go!!

Saturday, October 29, 2011

Sneak - A - Peek

At week 27 and Avery's room partially complete, I decided that now would be a great time to show off some pictures of what we have done in her room. Since the room is not all the way done, I am not posting full pictures of anything. Some pictures will be obvious and some will not.

I hope you enjoy the pictures as much as I enjoyed sharing them. It's CRAZY that we are only 3 months away.... AAhhhhhhhh!

DSC_0722DSC_0717DSC_0713

DSC_0719DSC_0718
DSC_0712

DSC_0707DSC_0711


DSC_0706

DSC_0705

DSC_0710DSC_0704

Monday, October 24, 2011

What's In A Name?

Last night I wrote about how we told our family that we were having a GIRL.  Now I think it is time to share the name to everyone.  We have been telling people as they ask, but haven't done any kind of formal announcement. 

One night during the summer when Matt was working on our new fence, I went out with a chair and name book.  As he put in screws, I read off all the names that I thought could be in the running.  Of those that he liked, I wrote down.  So we had a list for a girl and if it were a boy we already had a name picked out.  So really, it was all about finding a girls name.  So when we found out that it was a "she" and not a "he", we pulled out that girls name list.  Every night before bed we would discuss our opinions of the names.  Once we had a first and middle name that we liked, we used it for a bit to make sure we really liked it.

The name we choose was:  AVERY JUNE LOVELADY

We choose Avery because we liked the name and it was different enough.  June is my Grandmothers name and we thought it was perfect for a middle name.  Not only is Avery a great name by itself, but we can also call her A.J.  My Grandmother, June, is my only living Grandmother.  Anyone that knows June Harter knows that she would do ANYTHING for you.  She is always entertaining, always making something sweet, and has been one of my biggest cheerleaders in life.  I could never think of anyone else I would rather name our first daughter after.
We are SOOOO ready to meet little Avery!
DSC_0708

(These are the letters I made for her room.  So sweet and so PINK)

Sunday, October 23, 2011

"It's A Girl" Pink Sopapilla Cheesecake

It has been a CRAZY past few months and those crazy times have kept me away from baking and posting on my blog. 
I am currently on week 26 (27 weeks on Tuesday) and am finally posting on the week that we told our parents the sex of Baby L.

Two weeks before my parents came to town, Matt and I found out the sex of Baby L together.  We decided that we would not tell anyone because I really wanted my mom and dad to be at the appointment with us.  This being their first grandchild and the fact that I am my moms only daughter, I did not want to deny them that exciting doctors appointment.  So, 2 weeks later during Labor Day weekend, we had both sets of parents over for dinner.  Of course, my family came for the long weekend, the whole time Matt and I having to make sure we didn't slip with "she" or "her." 

That Saturday night for dinner, I had to figure out some way to break the news in a creative way.  With all of the baking that I have done in the past I knew that the dessert needed to show boy or girl in a creative way.  Again, Pinterest is one of my favorite websites and apps right now.  On there I found a recipe for Sopapilla Cheesecake.  It had nothing but great reviews so I decided to make it.  But, I had to change it up in some way to have PINK!

Here is what I did:

Ingredients:
-3 cans pillsbury butter crescent rolls
-2 (8oz) packages cream cheese (softened)
-1 cup sugar
-1 teaspoon vanilla
-1/4 cup butter (melted) - I used less
-Cinnamon & sugar
DSC_0647

Spread 1 1/2 cans of crescent rolls in your pan.

DSC_0648

In your mixing bowl mix together the cream cheese, sugar, and vanilla.

I put in red food coloring to make a PINK filling.
DSC_0650

Spread the cream cheese mixture on top of the crescent rolls.  Then add the other 1 1/2 cans of crescent rolls on top.  Melt the butter and brush onto the crescent rolls and then sprinkle on the cinnamon and sugar.
DSC_0652

Bake at 250 degrees for 20-30 minutes. 
DSC_0654

Before we even pulled out the yummy dessert, Matt went into the other room and got the PINK outfit and that is how we told our parents.  We were then able to have dessert and pull out the first pictures of our little GIRL.  (We were NOT wearing the pink shirts when family came for dinner.  My mom had told everyone to wear what color shirt they thought the sex of Baby L would be.  After we told, my mom had us go put on PINK shirts for this picture)


That tuesday was the doctors appointment that we scheduled just so that mine and Matts parents could go to.  They were all able to see her in action.  It was such a fun weekend and we were so blessed to share it with our parents.

Sunday, September 11, 2011

Chewy "Coconut" Lime Cookies

Does anyone else have a Pinterest obsession besides me?
I have found MANY MANY MANY things to make and bake and decorate.

I have a board called "Good Eats" and on my board I had saved on there Chewy Coconut Lime Cookies.  The pictures is to die for.  Just check it out.  Is your mouth watering already?  Because mine did this afternoon after I saw this picture again.  To top off the yummy picture, I then looked at what it took to make these.  Ok, I would have to go to the store for like 2 things- a large lime and coconut.  I ended up forgetting the coconut so I made Chewy Lime Cookies. 

Picture taken from The Girl Who Ate Everything.  Check out her blog.  Everything looks delish.
So, this afternoon while Matt went to work, I went to the store.  Like I said, I forgot the coconut.  Oh well.  I think these are perfect without it.  If you would like to make these easy cookies here is the recipe...
Chewy Lime Cookies:
2 3/4 cups all-purpose flour1 teaspoon baking soda
½ teaspoon baking powder
½ teaspoon salt
1 cup butter, softened
1 ½ cups sugar
1 egg
½ teaspoon vanilla extract
zest of one large lime, finely minced
3 tbsp lime juice
½ cup unsweetened toasted coconut
½ cup sugar for rolling cookies
1.  Preheat oven to 350.  If you would like the coconut in your cookies this is the time to toast them in the oven for about 5-7 minutes.  If you're like me and want to scratch that part, mix until fluffy the butter and sugar.
2.  Then add the egg, vanilla extract, lime juice, and lime zest.  Mix and drool over the smell.
3.  Mix in the dry ingredients.
4.  Roll the dough into balls and then roll into sugar in a bowl.  I found that it was a lot easier to roll the dough if I stuck it all in the freezer for 10-15 minutes. 
5.  Place on cookie sheets.  Be aware because these cookies like to spread-so give space in between.  Bake for 8-10 minutes.

Below is the picture of the cookies that I made.  The lime is so refreshing and the soft texture is perfect.  Matt told me that these were his new favorite cookies and I think they are mine as well.  Try these out and let me know what you think, especially if you try them with coconut. 
DSC_0658

Talking about these cookies just makes me want another...

Monday, August 29, 2011

Hello Blog, Nice to See You Again

Hello Blog, Oh how I have missed you. 

Since finding out I was PREG- the last thing I had energy to do was bake or post on a blog. 

No energy = a great deal of lounging on the couch.

So, for the past few weeks I have bought bananas at the store, only to watch get ripe on the counter.  I always have to act quick if I want to make something before Matt throws them away.  I have lost very many bananas that way.  Banana bread has been a very easy and quick breakfast I can take with me to work.  So tonight it was bread making night.

I have given this recipe before, but I made them in muffin form.  This time...a LOAF.

So here is the recipe again.  It is my fav and calls for some different items.  Down here in the AR, people have not heard of blueberry banana bread.  No lie, it is so much better then the original.  Trust. Me.  And it's better for ya. (Wink-Wink) 

Alright, here we go!

Blueberry Banana Bread:

1/2  cup butter
1 cup sugar
2 eggs
1 cup bananas, mashed
1/2 cup quick oats
1 1/2 cup flour
1 tsp. baking soda
1/4 tsp. salt
1/2 cup pecans (optional- I didn't use)
1 cup blueberries

DSC_0639

1.  Cream together butter, sugar, and eggs.
2.  Mix together bananas, quick oats, flour, baking soda, and salt
3.  Fold in the blueberries and pecans

DSC_0641

Quick Oats- Who would have thunk.

DSC_0642

Do you have one of these sweet sprayers?  You put in your own vegitable oil and then pump and spray.  Now-a-days you're hearing how bad aerosol spray is for you.  Mine is from Pampered Chef and I LOVE.  Also a great stocking stuffer for Mom.

DSC_0643

Grease loaf pan and bake at 350 for 50-55 minuutes. 

Serve HOT with butter or cream cheese!  Enjoy!